Customize Timeline Display
You can change how the Timeline is displayed in the Timeline tab permanently via the Preferences dialog box, or for only that Timeline tab via the Set Timeline Display dialog box. The options offered in each dialog box are the same, except the Set Timeline Display dialog box offers an additional option to apply your changes as the default.

- Do one of the following:
- To have changes apply only to the current Timeline tab, right-click anywhere in the Timeline area and choose Set Timeline Display from the shortcut menu
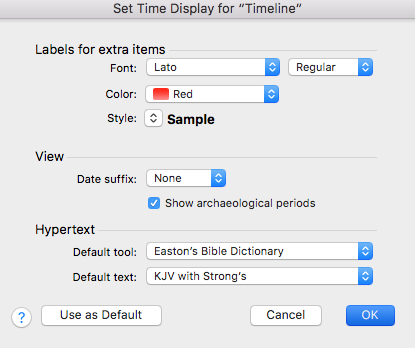
 Also known as a contextual menu, acessed by right-clicking (or pressing Ctrl+Click, Mac only) over a screen element that appears. The Set Time Display for "Timeline" dialog box appears.
 - To apply the changes to all future Timeline tabs, on the Accordance menu choose Preferences. The Preference dialog box appears. Click Timeline Display in the Preferences list to display the Set Time Display options.
-
Define the appearance for extra items on the Timeline using the standard Font, Color, and Style options.
The extra items style is applied to items on the Timeline when "highlighted" manually, or when an item is found via the Find option, or when amplifying to the Timeline.
- Define the appearance of the Timeline itself.
- Choose the suffix for dates. Available options are None (default), BC/AD and BCE/CE.
- Choose to hide or show archaeological periods on the Timeline.
- In the Hypertext area, set the default Tool and Text when amplifying from an item on the Timeline.
-
When done, click OK.
If working in the Set Time Display for "Timeline" dialog box, click Use as Default to make these changes the default settings as well.