Customize Display of the Atlas Tab
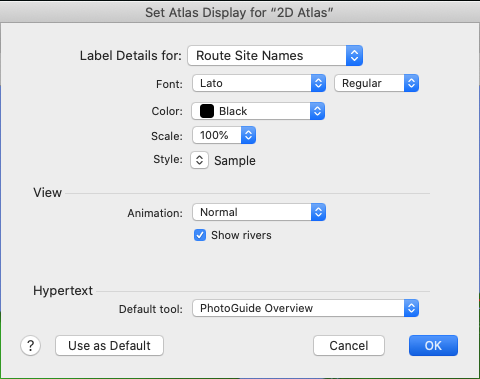
You can permanently change the display of the Atlas tab via the Preferences dialog box, or for only that map via the Set Atlas Display dialog box. The options offered in each dialog box are the same, except the Set Atlas Display dialog box offers an additional option to apply your changes as the default.
To change how maps are displayed in the Atlas tab:
- Do one of the following:
- Open the Set Atlas Display dialog box to change only the current display.
On the Display menu, choose Set Atlas Display. - Open the Preferences dialog box to change the display for all future Atlas tabs.
- On the Application menu, choose Preferences. The Set Atlas Display dialog box appears.
- In the left panel, choose Atlas Tab Display. The Atlas Tab Display area options appear in the Preferences dialog box.
- Choose the Label Details for which you want to set display characteristics. Available options are: Route Site Names, Region Names, Extra Site Names, and Extra Region Names.
- Choose the Font, Color, Scale and Style for the label type.
- Switch to a different Label Details option and select the Font, Color, Scale and Style for that option.
- Repeat for all four Label Details options.
Accordance automatically saves these settings.
- Choose the type of animation you prefer. Available options are Normal, Continuous, and No Faded Route.
- Choose whether or not to display rivers.
- Choose the default tool that opens when amplifying from a map name to a tool. You can choose from a list of all available tools.
- Click OK to save your changes.
- If working in the Set Map Display dialog box, your changes apply only to the active
 The application, window, tab, or other screen element which is currently being used; sometimes called the "front" or "frontmost" screen element Atlas tab. If desired, click Use as Default to have your changes applied to the Preferences.
 - If working in the Preferences dialog box (Atlas Tab Display area), your changes apply to all subsequent Atlas tabs.

