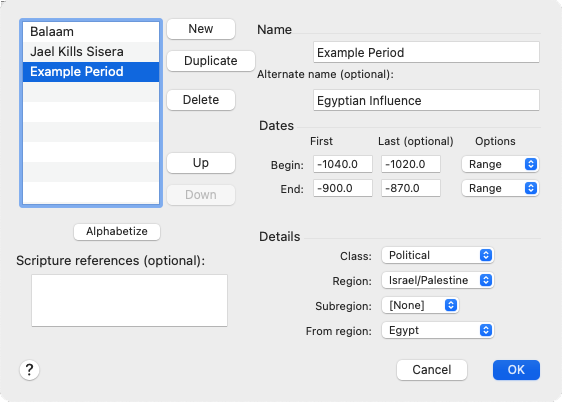
Define User Items Dialog Box
Prerequisites for use: A Timeline tab is the active![]() The application, window, tab, or other screen element which is currently being used; sometimes called the "front" or "frontmost" screen element tab.
The application, window, tab, or other screen element which is currently being used; sometimes called the "front" or "frontmost" screen element tab.
Use: The Define User Items dialog box is used to add and define User Items, and to modify existing items.
Description:This dialog base is used to create your own database of User Items which can be included in a Custom List for display on a Timeline Item Layer.
Open the Define User Items Dialog BoxOpen the Define User Items Dialog Box
Do one of the following:
- From the Items pop-up menu, choose Define User Items.
- On the Display menu, choose Define Time Layers>User Items.
Define User Items (Overview)Define User Items (Overview)
- Open the Define User Items dialog box.
- Click New button to create a new User Item. [New name] is added to the list of User Items and the Name box.
To remove the new item click Delete. - In the Name box, enter a name for the item, and an alternate name if desired.
- Define the item details of the item.
- Save your changes by doing one of the following:
- Click New to save and add another User Item.
- Click OK to save and close the dialog box.
- If desired, click Duplicate to create a copy of an item and then change some of the settings.
Example: Create a series of kings in the same region by changing just the name and dates each time you duplicate the item.
|
Notes
|
Display User ItemsDisplay User Items
To display User Items on the Timeline:
- In the Define Item Layers dialog box, select All User Items for the Custom List in an Item Layer. This list automatically displays the political periods and all User Items.
- In the Define Custom Lists dialog box, create a Custom List that includes your User Items. You can then have this list included in an Item Layer via the Define Item Layers dialog box. New User Items do not appear in any Custom List (except All User Items) until they have been added to the list.
Options in the Define User Items Dialog BoxOptions in the Define User Items Dialog Box
List of User Items (Top Left): Displays any User Items already defined. The User Item last used when this dialog box was closed is selected when the dialog box is reopened. Click a User Item name to display its current settings in the dialog box. You can then edit the settings for that item.
List Buttons: Used to arrange the names in the list and on the Custom List pop-up menu in the Define Item Layer dialog box.
- New: Adds "new name" to the list and in the Name box, and resets the rest of the settings to their defaults.
- Duplicate: Creates a copy of the selected User Item. The duplicate User Item is automatically given the same name, followed by a number (for example XXX.1 and XXX.2 for the same list duplicated twice). You can rename the list via the Name box.
- Delete: Removes the selected name and its settings.
|
Note You cannot delete a User Item if it is being used in a Custom List. |
- Up and Down Buttons: Click to move the selected User Item up or down the list.
- Alphabetize: Arranges all names in the List of User Items in alphabetical order.
Name Box: Used to enter or modify the User Item name. Adding spaces before the name will indent it on the list.
Alternate Name (optional): Used to enter an optional alternative name, which can be used to amplify![]() To select words or a reference and search for the selection in the text or tool of your choice. You can select the resource in the Library or Amplify menus. A triple-click is a shortcut which amplifies to the top tool of the relevant category. to and from the Timeline.
To select words or a reference and search for the selection in the text or tool of your choice. You can select the resource in the Library or Amplify menus. A triple-click is a shortcut which amplifies to the top tool of the relevant category. to and from the Timeline.
Scripture references (optional) Box: Enter references for the selected User Item. Entering Scripture references enables amplifying to the Bible verse associated with that item. The references are not validated until you click them. If the verse is not found in an open recyclable Text tab, or the default Bible text, a blank Text tab opens.
Dates Area: The options in this area are used to enter dates for the User Item.
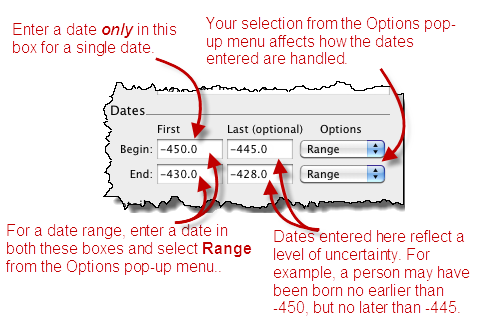
- The date limits are -3000 to 2000. BC or BCE is entered with a minus sign preceding the date.
- Begin Row: Entries in these boxes are for the starting date of the User Item.
- First Box: Enter the definite (earliest) beginning date.
- Last (optional) Box: Enter the alternative possible beginning date.
- Options Pop-up Menu: Available options are used to define the level of uncertainty. These uncertainties appear in the details area and in the Timeline Data tab, and affect display of the marker for the item on the Timeline
- Range: The item has a date range.
- Example: If you entered Begin and End dates of -450 and -430, and optional Last begin and end dates of -445 and -428, that time would be displayed as beginning anywhere from 450 to 440 BCE and ending anywhere between 430 and 428 BCE.
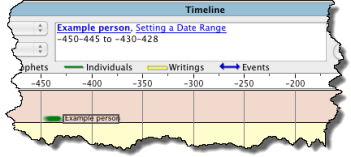
- Circa: Indicates a small degree of uncertainty as to the exact date.
Example: Enter a Begin First date of -450 and select Circa. The date for the User Item is displayed as ca. -450 (meaning, around 450 BCE). - Alternate: Places a slash between the Begin First date and the Begin Last date, indicating an alternative date.
Example: Enter the same dates as for Circa (above), but choose Alternate. The date is displayed -450/440 meaning that the User Item began in either 450 BCE or 440 BCE.
Between: The item is of uncertain length and falls anywhere between the First Begin and First End or Last End dates (whichever is latest). The End pop-up menu setting is ignored.
Example: The date would be displayed as between -450 and -430. - End Row: Entries in these boxes for the ending date of the User Item.
- End Box: Enter the definite end date.
- Last (optional) Box: Enter the alternative possible end date.
- Options Pop-up Menu: Available options are used to define the level of uncertainty. These uncertainties appear in the details area and in the Timeline Data tab, and affect display of the marker for the item on the Timeline
- Range, Circa, and Alternate: Same as above, except these relate to the end date.
- Fixed: The duration of the event/time period is known, for example 20 years. The time interval between the First Begin and First End dates must be the same as the interval between the Last Begin and Last End dates. A message appears if the time interval is not the same, along with a suggestion for how to change the dates for correct display of a fixed time period.
Example: The date would be displayed as 450/445 to 430/425 BC (20 years).
Details Area: This area is used to define the User Item class, geographical location, and subregion.
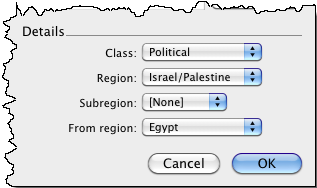
 Class Pop-up Menu: Choose one of the classes of items. The setting affects how the User Item is used in the Item Layer. If Political is selected, you can define a new political period.
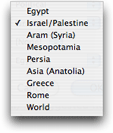 Region Pop-up Menu: Choose the region in which the new User Item is to appear.
- Subregion Pop-up Menu: Used to assign the User Item to a specific horizontal band within the region. You can choose up to four subregions, and you may wish to create political periods to identify the subregion.
- Items assigned to subregion 1 appear at the bottom of the region.
- Items in the other subregions are grouped in bands above them.
- Items assigned to no subregion are spread throughout the region band, according to date and class, and may overlap other items which are assigned to subregions.
- Subregions affect the entire length of the region, although they may not be visible in areas where no items are assigned to them. Each subregion band is of equal width, wide enough to display all items currently displayed in each subregion.
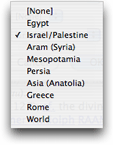 From region Pop-up Menu: This pop-up menu is dimmed unless Political is chosen from the Class pop-up menu. Use this option to show that the major influence in this period comes from another region. The period is colored with that region's color, if Use region colors is selected in the Define Region Layer dialog box.

