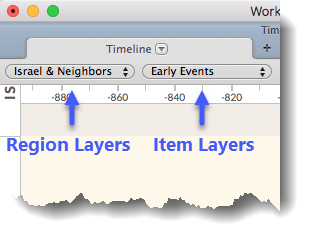
Region Layers
Region Layers define and display specific geographical areas. The Timeline is provided with several Region Layers. These can be copied and edited, or you can make your own.
Region Layers present major geopolitical regions as horizontal bands across the Timeline, labeled in the left border of the Timeline. Each region has a light colored background. The height of the band varies depending on the number of items currently displayed in that region.
In some cases, regions are divided horizontally into subregions. These represent divisions of political power within the main region, such as Israel and Judah during the period of the divided kingdom.
Political periods such as dynasties or empires appear as blocks of more intense colors, either one color for all political periods, or each in the color of the region with which they are associated. The latter option helps to illustrate the influence of one region over another. If the period is too narrow to display its full name, it is shown with an ellipsis (...).
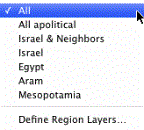
The Region Layers Pop-Up MenuThe Region Layers Pop-Up Menu

 To select a different Region Layer, simply choose it from the Region Layers pop-up menu.
The Region Layer pop-up menu is divided into two sections:
- The top section lists pre-defined Region Layers.
For example, Israel & Neighbors includes the regions of Israel/Palestine and the adjacent regions, Egypt, Syria, and Mesopotamia.
Note
If the Timeline tab does not display any items, it may be that none of the items in the current Item layer belong to the regions shown in the current Region layer.
- The Define Region Layers item at the bottom is used to create or modify layers. You can define the regions to be displayed, their colors, and the political periods for each region.
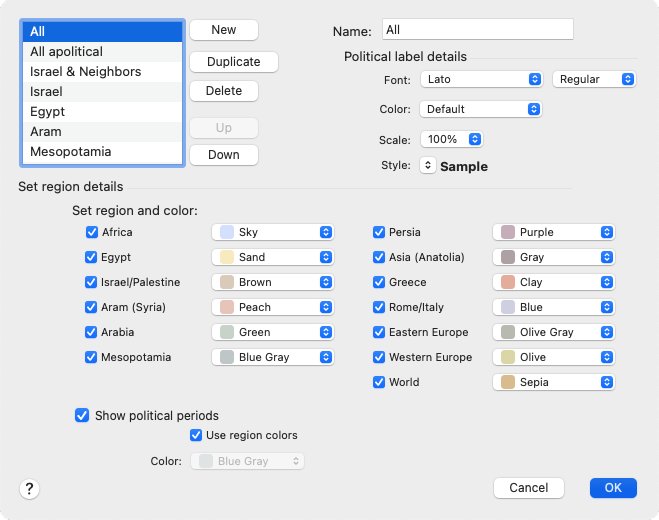
Define/Edit a Region LayerDefine/Edit a Region Layer
You can create a new Region Layer, edit an existing Region Layer, or create a copy of an existing Region Layer and modify it.
- On the Region Layer pop-up menu choose Define Region Layers. The Define Region Layers dialog box appears.
- In the Define Region Layers dialog box, do one of the following:
- To create a new Region Layer, click New. [New name] is added to the list on the left and appears in the Name box.
- To edit an existing Region Layer, select it from the left panel. The layer's name is displayed in the Name box.
- To make a copy of a Region Layer and modify the copy:
- Select the desired layer in the left panel.
- Click Duplicate. The original layer name, followed by a number appears in the list and in the Name box.
- If desired, enter a new name for the duplicate layer. The change is immediately applied.

Hint
If you do not see the new name in the list, refresh the display by clicking the Up or Down button.
- In the Define Region Layers dialog box, define the appearance of the layer as follows:
- Define the appearance of political text labels using the standard Font, Color, Scale, and Style pop-up menus.
- Define the regions and their colors in the Set region and color area.
- Decide whether or not political periods should also be displayed. If selected, you can also define a color to apply to the political periods.
- When done, click OK.

