Example: Customize a Route Layer
Goal: You want to create a Route Layer in a 2D Atlas tab that includes routes followed by the Babylonian and Egyptian armies during the invasion of Jerusalem. This is done by creating a custom route layer with the necessary routes.
|
|
Note Atlas Route Layers are created by utilizing the route information contained in pre-existing layers. It is not currently possible to create new route information. |
- Create a Custom Route Layer by doing the following:
- Open a 2D Atlas tab. An Atlas tab can be opened via the Library, the File menu, or the Workspace toolbar.
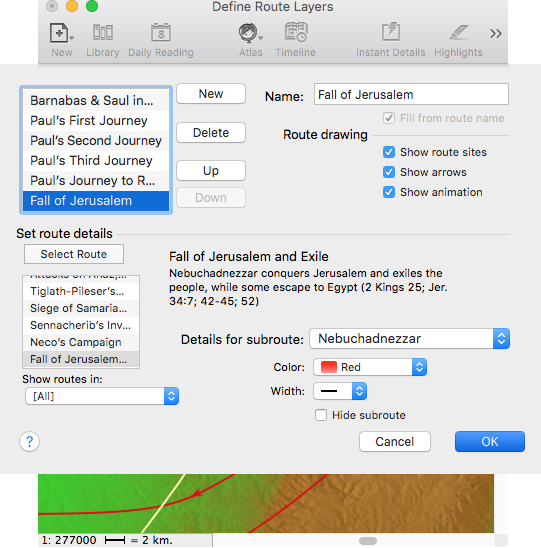
- Select Define Route Layers from the Route Layers pop-up menu. The Define Route Layers dialog box appears.
- Click New at the top of the Define Route Layers dialog box. [New Name] appears in the Name field of the Route Layers dialog box.
- Select Fall of Jerusalem and Exile in the Set route details area of the Define Route Layers dialog box. Fall of Jerusalem and Exile is highlighted in the Route Details list.
- Click the Select Route button to enter your selection in the Name field. Fall of Jerusalem and Exileis displayed in the Name field.
- Give your new route a unique name in the Name field by shortening it to Fall of Jerusalem.
- Customize your new route layer by deciding how the elements of the route are displayed. These options are found in the Route drawing area of the Define Route Layers dialog box:
- Show route sites: When selected, displays the site names associated with your route.
- Show arrows: When selected, places arrowheads on all route marker lines.
- Show animation: When selected, allows the routes to be animated.

- Every route contains one or more subroutes. For this example you will only retain the Nebuchadnezzar and Egyptians subroutes:
- Select Exiles from the Details for subroute drop-down list and select the Hide subroute check box.
- Select Flight to Egypt from the Details for subroute drop-down menu and select the Hide subroute check box.
- Click OK. The Fall of Jerusalem route is created and displayed in the 2D Atlas tab.