Example: Create a Custom Site Layer Based on Selected Sites on a Displayed Atlas
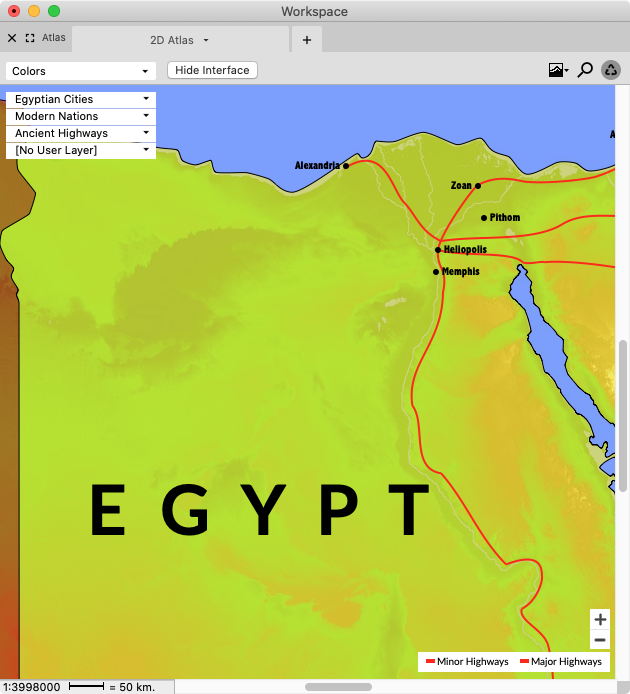
Goal: You want to create a Site Layer in a 2D Atlas tab that displays important Egyptian Cities mentioned in the Biblical text. You'll do this by converting existing sites to a Custom Site Layer.
|
|
Note The Accordance Atlas consists of two elements: (1) a background of the Mediterranean world (you select the color), and (2) individual layers that can be placed over the background. You can use predefined layers or create your own. In this example you will create a layer and add the names of Egyptian cities to that layer. You will then save the layer for later use. |
- Set up display of the Atlas to prepare it for conversion to a Custom Site Layer by doing the following:
- Open a 2D Atlas tab. An Atlas tab can be opened via the Library, the File menu, or the Workspace toolbar.
- Select All Biblical from the Site Layers pop-up menu. Cities mentioned in the biblical text appear on the Atlas.
- Select Modern Nations from the Region Layers pop-up menu. A layer displaying the borders of modern nations appears on the Atlas.
- Press Shift and click on each city located within the borders of Egypt. Each of the names of the cities turns red.
- Convert your display to a Custom Site Layer by doing the following:
- On the Site Layers pop-up menu, select Convert to Custom Layer. The Define Custom Site Layers menu appears.
- In the Name field of the Site Layers dialog box, type Egyptian Cities. Egyptian Cities is displayed in the Name field.
- To customize the appearance of site labels, change the relevant settings in the Label details area.
|
|
Note The size of the font used to display the name of the sites is determined by the relative importance of the site and cannot be changed. |
- Click OK. Your new custom layer appears in the Site Layers pop-up menu.
The new site layer can now be displayed by selecting Egyptian Cities from the Site Layers pop-up menu.
